
Set the opening angle by deciding where the lid should rest while the customer sees and removes the product. Then develop the hinge travel, any stopping ribbon and the base stability around that position. A lid that reaches an angle does not necessarily stay there safely or provide good access.
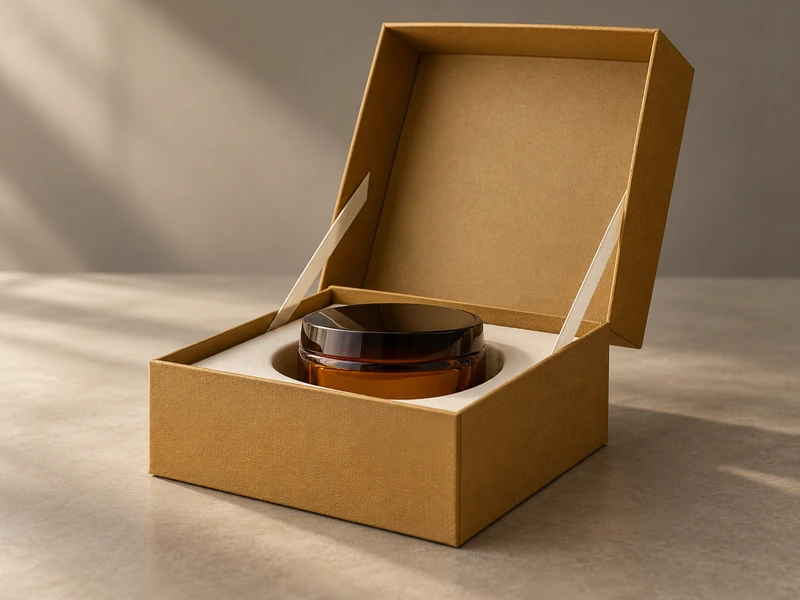
SevenRainbowpack’s hinged lid rigid boxes include several structures and opening directions. Choose the mechanism before specifying an angle. A paper-covered book hinge, a directly attached lid and a shaped shoulder construction do not all move in the same way.
How Will You Define the Angle on the Drawing?
State the reference clearly. One useful convention is zero degrees when closed, 90 degrees with the lid upright and 180 degrees when it lies flat behind the base. Put a side-view sketch beside the number so everyone uses the same interpretation.
If the box opens sideways, draw that plan view instead. “Open to 110 degrees” is ambiguous without knowing the axis and the starting position. A rendering with perspective can make the angle look different from the intended structural value.
Our hinged lid versus book-style article helps establish those distinctions. Keep the chosen opening direction consistent in the structural brief, artwork mockup and sample photographs. It is easier to resolve a disagreement in a sketch than after printing the inside lid.
Which Tasks Must the Open Box Accommodate?
The open position needs to accommodate viewing, product removal and any message printed inside the cover. Try those actions separately before choosing the resting angle. A lid set for a readable message may still obstruct a tall product or shade a rear compartment.
Use the actual product and intended table height when evaluating the view. A top-down studio photograph is not the same as a customer looking down from a standing position. Check the front row, rear row and any accessories hidden near the hinge.
For a beauty set, simulate lifting the tallest bottle with one hand. The lid should not enter that path or require the other hand to hold it away. If the package is intended to stay open on a counter, test that resting condition explicitly.
| Intended Use | Question That Sets the Angle |
| Tabletop product reveal | Are all product faces visible from the expected approach? |
| Removal of tall items | Can the hand and product clear the lid without a second action? |
| Printed inside-lid message | Is the message readable without tilting the whole box? |
| Reusable storage | Does the lid stay conveniently out of the access area? |
What Limits the Hinge’s Natural Travel?
The board layout, covered joint, tray position and neighboring panels all affect rotation. Check where the first restriction occurs. It might be a tight wrap at the hinge, a lid corner touching the base or a shoulder interfering with movement.
Do not use the wrapping paper as an accidental stop. If the lid stops because the paper is pulled tight, repeated opening may stress the joint or distort its appearance. Define the intended stopping feature and verify the hinge remains comfortable at that position.
SevenRainbowpack’s book-style rigid box options are relevant when the structure uses a spine and flexible covered joints. Review the spine, hinge gaps and tray placement together. Changing the desired open position can require more than altering the ribbon length.
Should the Lid Be Designed to Lie Flat?
Only when the use and construction support it. A flat-open lid needs room behind the base and a hinge that accommodates the movement. It may be excellent for reusable storage but unsuitable for a narrow retail shelf.
If the lid is expected to rest on the table, check what touches the surface. Raised foil, a textured wrap or a projecting closure can rub there. Include that contact in the appearance review rather than treating the open lid as suspended in a rendering.
How Does a Ribbon Stop Set the Position?
A stopping ribbon connects defined points on the lid and base, limiting their separation. Its effective length between the attachment points helps establish the maximum angle. The total cut length also includes the portions captured in the assembly, so those two dimensions should not be confused.
Mark the attachment positions on the structural drawing. Moving an anchor closer to the hinge changes the relationship even when the ribbon length stays the same. Board thickness, folded ribbon and the actual anchor position should be represented in the prototype.
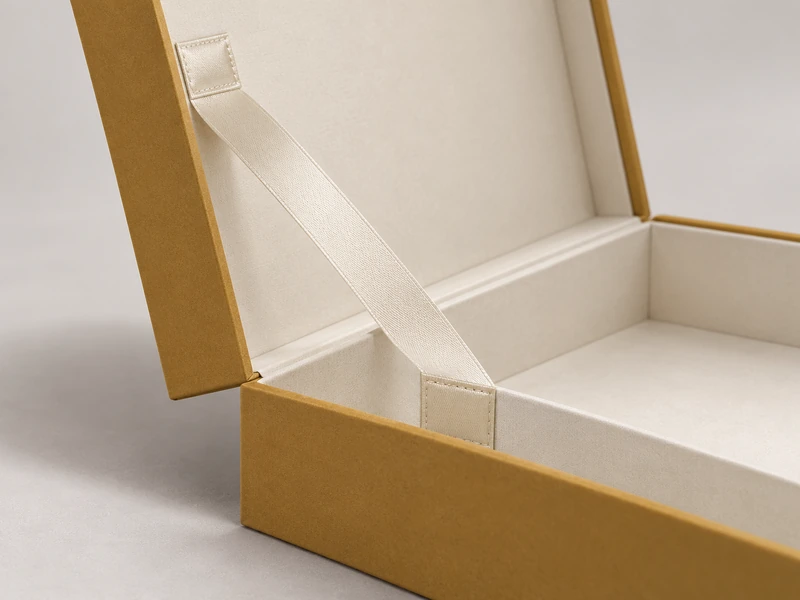
Prototype the ribbon before fixing its final cut length. Open the lid gently until the stop takes load and compare the result with the approved side view. A taut ribbon should limit travel at the intended position without pulling the sidewall inward.
Is One Ribbon Enough?
It may be adequate for a small light lid, but review twisting and the attachment load. Two balanced stops can control a wider lid more evenly, provided both engage consistently. Unequal effective lengths can make one side carry the load while the other hangs loose.
Keep the stops clear of products, finger recesses and the closing path. A ribbon that falls into a bottle cavity can be trapped when the lid closes. Examine its relaxed position as carefully as its taut display position.
Will the Box Stay Stable When Open?
Check it loaded, partly emptied and empty. As products are removed, the weight holding the base down changes. A lid that stays behind a heavy gift can tip the same box when only a light card remains.
The lid’s mass and distance from the hinge influence its turning effect. Large inserts or decorative panels inside the lid can make that effect more noticeable. Evaluate the finished lid rather than assuming a blank board sample represents it.
Do not count on the customer holding the base unless that is an explicit, reasonable part of the opening sequence. If stability is marginal, reconsider the resting position, base footprint or lid build. A stronger stop ribbon cannot by itself make an unbalanced package stable.
When Should the Inner Artwork Be Approved?
After the resting angle and viewing position are established. A message centered on the flat artwork may appear too low behind a tall rear product. Review the printed lid with the complete set in place.
Use our printed insert-card planning guide to decide whether instructions belong on the lid or a separate card. The lid can carry the brand story while a small card explains a product-specific action. Avoid filling a difficult viewing area with essential information.
Keep fine type away from ribbon anchors and moving folds. Also check whether a mirror or extra panel changes the lid’s weight and stability. Any addition to the inner lid belongs in the mechanical review, even when it arrives as an artwork request.
Can the Lid Hold the Same Position After Repeated Use?
Check whether the intended resting behavior depends on a tight new hinge. Covered joints can settle with use, so a lid that briefly stands upright in a fresh sample needs another look after repeated opening. The stop limits travel; it does not necessarily hold the lid at every smaller angle.
Demonstrate the behavior without a hand supporting the lid and without products arranged as temporary counterweights. Then remove the products in the intended order. Watch for a change in lid movement or base stability as the set becomes lighter.
For a wide lid, observe both sides of the stop arrangement from the front. One side becoming taut early can twist the cover and make the printed panel appear crooked. Compare the attachment points and effective lengths before adjusting the whole hinge layout.
Keep the accepted behavior in a short side-view video as well as photographs. Movement, hesitation and a ribbon falling into a cavity are often easier to understand in that record than in a carefully selected still image.
What Should the Sample Review Record?
Record the angle convention, intended resting position, stop attachment points and loaded configuration. Photograph the open box from the side and the customer’s viewpoint. Then demonstrate product removal and closure without arranging the ribbons by hand first.
ISTA’s design and testing guidance recommends documenting evaluation results, including useful photographs and drawings. Use that discipline for the sample record, while keeping a tabletop function check distinct from transport validation. They answer different questions.
Our white, printed and pre-production sample guide helps stage those decisions. Give SevenRainbowpack the use scenario and the proposed view, then approve the final material build in motion. The right angle is the one that makes the gift easy to see, reach and close again.