
Protect a pillar candle’s wax by controlling where it touches the packaging, stopping unnecessary movement and giving it a gentle exit from the insert. A rigid outer box protects the overall shape of the pack, but it cannot prevent a rough lining or tight cavity from marking exposed wax. Design the contact surfaces first.
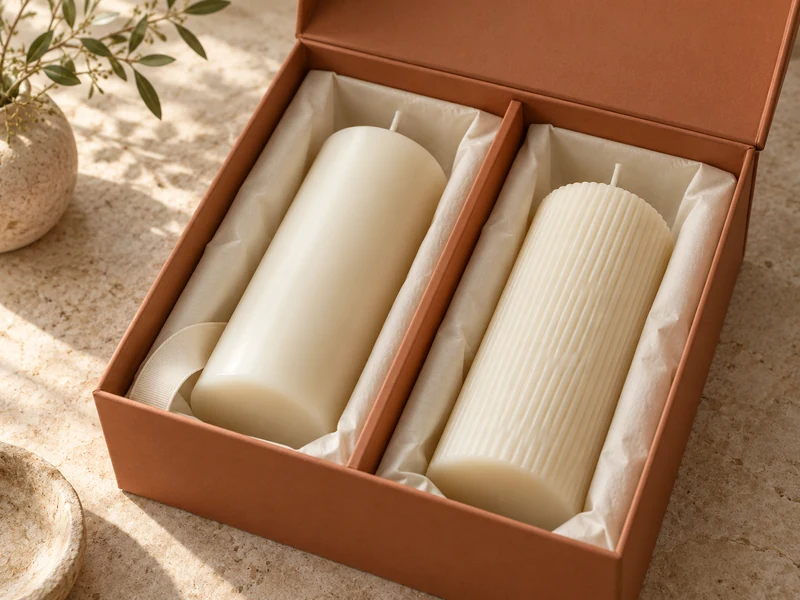
SevenRainbowpack’s rigid candle box range is a useful starting point for the exterior and insert discussion. A bare pillar needs a different contact review from a candle enclosed in glass. Its finished surface is part of the product the customer receives, not a hidden component inside a vessel.
1. Where Should the Candle Actually Touch the Insert?
Choose deliberate support areas and keep decorative wax details clear of hard edges. Review the base, sidewall and top as different surfaces. A ribbed pillar may tolerate contact in a different place from a smooth glossy cylinder or a sculptural candle with projecting details.
Ask the candle maker which areas are suitable for support and which must remain untouched. Do not infer this from the candle’s apparent firmness at room temperature. Wax blend, surface treatment and the packed condition can change what leaves a visible mark.
Draw the contact zones on a simple product outline. Show any label band or individual wrap in that drawing too, since it changes what the insert touches. A cavity developed around a naked sample may grip differently when the production candle arrives with its intended primary protection.
2. Can a Smooth Barrier Prevent Rubbing Marks?
A suitable smooth barrier can separate the wax from textured board, exposed foam edges or a fibrous liner. Choose it with the candle supplier and test the real material combination. “Soft” by touch does not establish that a paper, textile or film will release cleanly from fragranced wax.
Check for color transfer, fiber pickup, sticking and visible impressions after the agreed contact period. Printed tissue may look attractive in the box yet leave an unwanted trace on a pale candle. Keep adhesive seams and printing away from direct wax contact where the chosen construction allows.
For a two-piece rigid box, the separate lid and base make it possible to develop a straightforward supported presentation. Use that freedom to keep the lining smooth around the product. Extra folds should not become pressure ridges hidden beneath it.
Should the Candle Be Wrapped Individually?
That can be useful, provided the wrap is compatible and can be removed without dragging over delicate details. Compare a loose wrap, a sleeve and a supplier-approved film on the actual candle. Each creates a different seam and removal action.
Treat the wrap as a designed component with its own dimensions. A tight seam across a sculpted ridge may mark the wax even when the box insert is excellent. Ask for the wrapped production sample before finalizing the cavity.
3. How Can You Restrain Movement Without Squeezing Wax?
Use geometry and planned support rather than simply tightening the entire cavity. A candle that rattles can rub repeatedly against its surroundings, but an interference fit may create pressure marks. The useful balance has to be established on the real product.
Keep cut board edges away from exposed wax. Where an opening surrounds the candle, inspect the edge treatment and any liner overlap. A smooth front face is not enough if the hidden cut edge scrapes the side during loading.
Our glass candle jar protection article considers movement control for vessels. Take the distinction seriously when adapting an idea for pillars: a glass jar can accept contact that bare wax cannot. Do not copy the same cavity pressure from one product to the other.
| Surface Risk | Detail to Examine |
| Polished or glossy wax | Fine scuffs from sliding contact during insertion and removal. |
| Ribbed or sculpted wax | Local pressure at raised details and cavity edges. |
| Pale wax | Color transfer, dust and fibers from nearby materials. |
| Fragranced wax | Compatibility of the actual barrier, print and adhesive system. |
4. Is the Wick Clear of the Lid?
Reserve headroom for the wick and the candle’s tallest detail. The lid should close onto its intended structural surfaces, not onto the candle top. Include any protective cap or wrap folds when checking that clearance.
A pad above the product can spread some contact, but it can also press a wick into the wax or leave its texture on the top. Assess it as a contact material, not as an automatic improvement. If the top is meant to remain untouched, preserve a real gap.
Look at the closed pack from the side and examine the product after reopening. A slight proud spot on a lining can be difficult to detect by pressing the lid with a hand. A section drawing and loaded sample are more informative.
5. Can Each Candle Stay in Its Own Space?
Separate pillars from one another and from accessories with stable compartments. Wax-on-wax rubbing can mark two otherwise well-supported candles. A loose matchbox, card corner or metal tool can also migrate into a carefully protected surface.
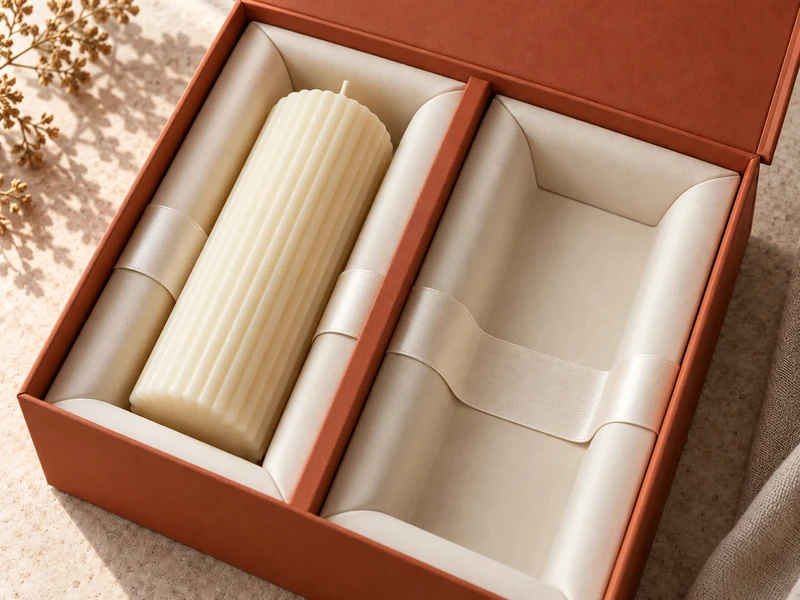
Give dividers enough height and support to maintain separation during handling. A low decorative strip may look orderly in a flat-lay photograph while allowing taller candles to meet above it. Evaluate the complete loaded set in the expected orientations.
Our candle and diffuser gift-box article is useful when planning a mixed gift. Keep the visual relationship between the items while giving each its own protected space. Shared presentation does not require shared contact.
6. What Changes When the Candle Becomes Warm?
Review surface protection under the conditions the candle may actually encounter. Warm wax can respond differently to an insert that looked harmless in a cool sample room. Ask the candle supplier to define the relevant product limits and acceptable appearance after exposure.
The National Candle Association’s storage guidance advises keeping candles in a cool, dark and dry place and notes that prolonged heat or bright light can cause damage. That supports controlling storage and delivery conditions. It does not establish a safe shipping temperature for every wax blend.
Avoid describing the rigid box as heat protection without a qualified package assessment. If the journey needs thermal control, develop that around the complete shipment. A prettier or thicker gift box cannot guarantee that the wax stays within its product limits.
7. Can the Recipient Remove the Candle Without Scraping It?
Build a removal route into the insert. A broad lifting support, a removable cradle or accessible side recesses can reduce the need to pinch the wax. Confirm that the chosen action lifts the candle evenly and does not drag it past a tight rim.
The same route should work at the packing table in reverse. Repeatedly pushing a candle through a narrow opening can create marks before the box leaves the factory. Watch a complete loading demonstration using finished candles.
Read our gift-box opening details guide when reviewing the final gesture. A hidden ribbon is little help if the recipient cannot find it until after gripping the candle. Keep the cue visible without placing loose material over the wax.
Which Marks Come From Packing Rather Than Delivery?
Inspect a candle immediately after loading and removing it once, before any handling evaluation. If a fresh mark is already present, trace the insertion path and contact points. This separates a packing problem from damage that appears only after storage or movement.
On a smooth pillar, a narrow vertical line may correspond to a cavity edge passed during loading. A repeated patch of texture may correspond to a folded liner or a support area. These are clues to investigate, not proof of a cause until the contact is reproduced on a controlled sample.
Keep the comparison candle under the same agreed environmental conditions without that packaging contact. That helps the candle supplier distinguish a surface change associated with the product itself from an impression introduced by the pack. Record the candle batch and materials used so the comparison remains useful.
Use consistent lighting for the photographs. A grazing light can reveal fine surface marks that disappear in a flattering front-lit product shot, especially on pale wax.
What Should a Surface-Protection Sample Prove?
Photograph each candle before packing, then inspect the same surfaces after the agreed storage and handling sequence. Record scuffs, dents, fibers, transfer and top impressions separately. A candle that remains intact can still have an unacceptable presentation surface.
Provide SevenRainbowpack with the actual pillar, primary wrap, contact-material requirements and the intended removal sequence. Include the palest and most delicate variants in the sample review. The successful result is a candle that leaves the box looking as carefully finished as it looked when it went in.