
Set the spine width from the finished closed assembly, including the tray, cover boards, wrapping and hinge arrangement. Product height alone cannot give you that dimension. The correct spine lets the cover close squarely without forcing the hinge, bowing the lid or leaving a loose back edge.
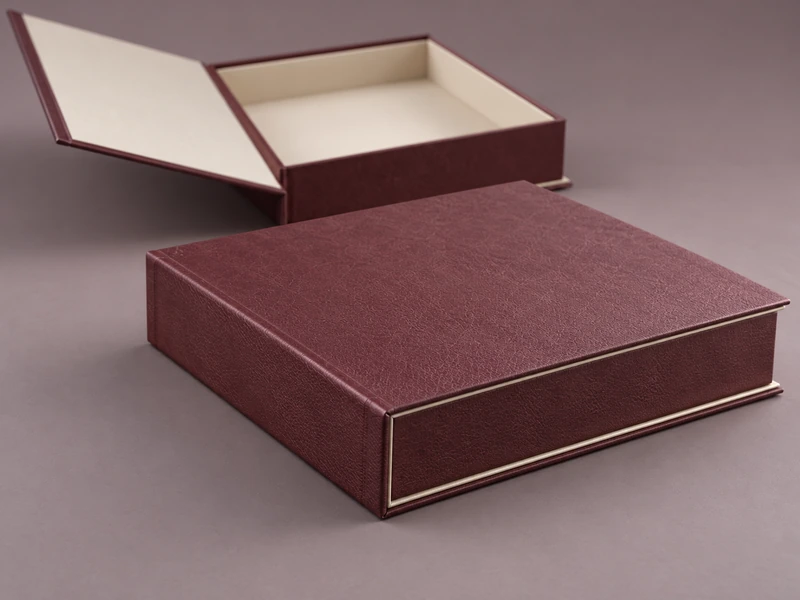
For SevenRainbowpack’s book-style rigid boxes, the useful starting point is a side section through the closed box. It shows where the tray sits, where the cover turns and what the spine actually spans. A flat artwork rectangle cannot settle those relationships by itself.
Which Dimension Are You Calling the Spine Width?
Name the dimension before calculating it. On a case-style construction, the spine panel sits between the cover panels, while flexible hinge gaps sit beside it. The visible closed spine, the board panel width and the distance between cover boards are related but need not be identical.
Ask the structural drawing to identify all three. Otherwise, a buyer may approve a finished exterior measurement while an artwork designer interprets it as a flat board dimension. That misunderstanding can move a foil title into a hinge even when both files contain the same number.
Also agree which way the box opens. A top-opening format and a side-opening book format may share a visual language while putting gravity, the tray and the closure in different relationships. Our hinged lid versus book-style comparison helps establish the construction before the spine is drawn.
What Belongs in the Closed Stack?
Measure the tray as a finished component, with its base support, lining and intended contents. Include anything that lifts the product: a raised insert, a presentation platform or a concealed accessory compartment. The tallest packed point may be a cap or ribbon knot rather than the nominal product body.
Then account for how that assembly is bonded to the case. A tray sitting directly on the lower cover differs from one mounted on a platform. A decorative lining between them also occupies space and can affect the final relationship.
List the proposed cover board, outer wrap, inner lining and any local overlaps near the hinge. Their effects are not always captured by adding nominal sheet thicknesses. Folded corners and adhesive build can make a local area thicker than a flat material swatch suggests.
| Drawing Item | What the Sample Must Confirm |
| Finished tray and insert height | The loaded contents stay below the planned closing plane. |
| Spine board panel | The closed back looks square without pulling either cover. |
| Flexible hinge gaps | The wrap turns freely without exposing an untidy opening. |
| Tray position on the case | The lid clears the tray during its full movement. |
| Closure build | Magnets, ribbon or elastic do not create unintended pressure. |
This schedule is more useful than a universal allowance. Two boxes with the same internal cavity can need different flat layouts because the board, wrapping and hinge construction differ. Keep calculated starting dimensions separate from approved production dimensions.
Why Can the Right Height Still Produce a Bad Hinge?
The hinge needs room to rotate as well as enough spine height to close. A narrow flexible joint can become tight before the lid reaches its intended position. Making the spine wider may disguise one symptom while leaving the rotation problem unresolved.
Look at the moving corner of the lid as it passes the tray edge. If it touches, the cause might be tray placement, cover overhang or hinge geometry. Diagnose that contact before changing several dimensions at once.
SevenRainbowpack offers textured papers, leatherette and different coatings for this box family. Review the actual chosen combination across the joint. A material that looks excellent on a flat panel may make a sharply worked hinge look stressed or uneven.
Should There Be a Standard Extra Allowance?
Use the manufacturer’s construction-specific starting allowance, then prove it physically. A fixed number copied from another box is unreliable when the reference has a different tray mount or cover material. The drawing should state whether an allowance belongs to the spine panel, hinge gap or finished closed clearance.
For example, imagine a fragrance set whose insert is later raised to make small bottles easier to grasp. Even if the products remain unchanged, the closed stack has changed. Recheck the spine and closure rather than treating the higher insert as an independent cosmetic improvement.
What Does an Undersized Spine Look Like?
A tight spine often announces itself at the front edge. The lid may spring upward, sit on the contents or pull the magnetic flap away from its intended landing position. You may also see the rear wrap stretching as the box is pressed closed.
Do not solve that by asking the packer to press harder. Close the box gently with the intended products and determine the first point of contact. An over-height cap, a proud insert or a trapped ribbon can imitate a spine problem.
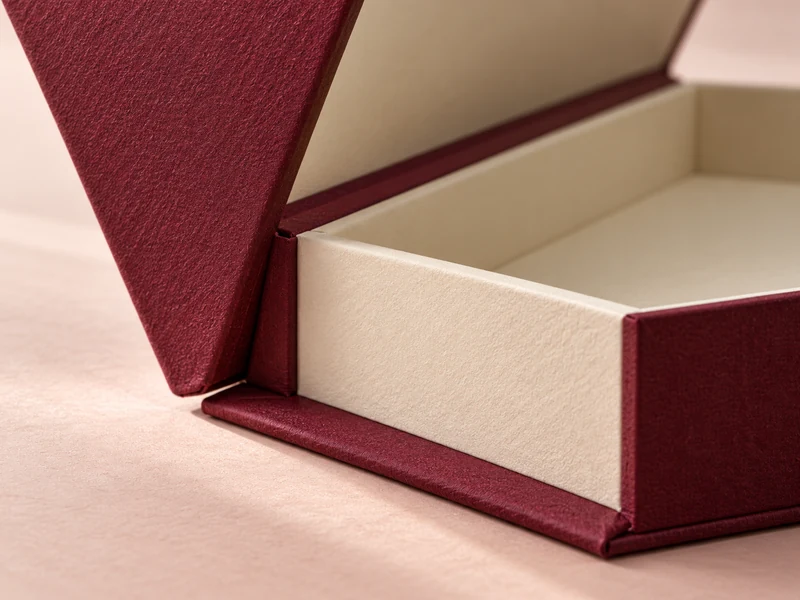
An oversized spine brings different symptoms: a loose back, excess motion between cover and tray, or a front closure that lands inconsistently. Check the unloaded and loaded sample side by side. If the geometry changes noticeably under product weight, the mounting and support need review as well.
When Should the Artwork Be Locked?
After the structural layout is stable. Center a spine title within the safe visible area defined by the approved drawing, rather than centering it between arbitrary artwork guides. Keep fine rules and foil details away from working folds unless the construction has been demonstrated with that treatment.
Our rigid box artwork checklist is useful at this handoff. The artwork file should follow the current structural revision. A beautiful print proof on an obsolete spine width still creates the wrong cover.
For a continuous pattern, review the closed spine and both adjacent panels together. A small mismatch can be conspicuous when straight lines run across all three. A more forgiving pattern may be a better design choice than demanding an unrealistic visual join at a moving hinge.
Do Magnets Set the Spine Width?
They influence the closing assembly, but they should not be used to force the cover into shape. SevenRainbowpack’s magnetic rigid box options provide a related closure route to consider. Locate the magnet faces after the lid and tray close naturally in the intended position.
Check that the flap lands evenly before the magnets engage. A closure that appears tidy only when strongly pulled into place can hide an unhappy hinge. It may also put uneven pressure on the front wall or the contents.
Which Sample Gives the Most Useful Answer?
A structural sample establishes the basic relationship, and a wrapped sample confirms how the real materials behave. Use the intended product or a representative equivalent with the same dimensions, mass and high points. An empty box cannot reveal pressure from a raised product.
Work through the stages in our white, printed and pre-production sample guide. Open and close the wrapped sample repeatedly, then inspect the front landing, rear profile and joint surface. Record the accepted movement and appearance with side photographs.
ISTA’s design and testing guidance calls for representative products and packages in performance evaluation. That principle supports using the final assembly here; it does not supply a standard spine-width formula. The structural decision remains specific to the box.
Can a Spine Change Without Changing the Cavity?
Yes: consider a stationery set whose product and tray remain unchanged while the outer wrap moves from a smooth coated paper to a heavier textured material. The usable cavity can stay the same, yet the hinge build and local overlaps need another review. Treat that as a construction revision, even when it began as a color-and-material request.
Compare the two finished covers in the same closed and open positions. Look for a change in joint tension, front-edge landing and the visible width of the spine. If only one of those features changes, record it separately so the structural adjustment remains focused.
A similar review is useful when a lid gains a pocket or printed panel inside. That added build may sit away from the spine but still affect the closed stack or how the lid rests. Show it on the section rather than leaving it to an artwork annotation.
Keep the obsolete dieline clearly superseded in the working files. The supplier, designer and buyer should all be reviewing the same spine revision when the final cover is signed off.
What Should You Send SevenRainbowpack?
Provide product samples, the intended insert height, opening direction, desired closed profile and selected cover materials. Mark whether any accessory sits above the tray edge. Include the target lid position when open, since the hinge must accommodate that movement too.
Ask for a revision-controlled side section showing finished dimensions and flat construction dimensions separately. Then approve a physical reference that closes under its own intended handling, without a squeeze at the spine. That reference gives production a much clearer target than a lone width written beside the word “book.”