
A beauty launch kit has a demanding first few minutes. The recipient needs to understand who sent it, what is new and how the products relate to one another. At the same time, every bottle and accessory must arrive in its intended position. An impressive lid opening cannot compensate for a confusing product arrangement or a missing piece of information.
PR packaging is easiest to plan as a small, coordinated distribution project. The rigid box is one part of it, alongside the products, printed content, packing process and delivery route. Each decision should support the intended recipient experience without creating unnecessary assembly work or making the package harder to handle.
This guide focuses on planning beauty and fragrance launch kits for media, creators, retail partners and other selected recipients. It does not assume that a particular box design will generate coverage or sales. The aim is to make the physical package clear, usable and consistent with the launch brief.
Define The Recipient And The Purpose
Begin by describing who will open the package and what they need from it. A retail buyer may compare the range and commercial proposition. An editor may need concise product facts and useful images. A creator may want to demonstrate the opening sequence and show the products clearly on camera.
Assign each recipient group a short list of practical needs before developing a shared kit. Identify the primary audience for each version of the kit. If different audiences need substantially different information or quantities, a shared box with separate printed content may be more practical than forcing every purpose into one crowded pack.
Write the intended action in plain language: examine the new bottle, try the collection, attend a launch or request more information. Avoid vague objectives such as “create excitement” without explaining what the packaging must communicate. A concrete objective gives the designer a basis for deciding what deserves the most visible position.
Build The Kit Around Final Products
List everything that will be packed, including caps, pumps, accessories and printed pieces. Obtain dimensions and weights from the final products or clearly identify provisional information. Small changes to a bottle shoulder or closure can affect how the insert supports the item and how it is removed.
For fragrance kits, specify whether full-size bottles, miniatures, testers or blotters are included. A collection of miniatures has different cavity and labelling needs from a single presentation bottle. For beauty sets, record whether cartons remain around the products or whether the items will be displayed directly.
Ask the product and logistics teams to confirm any handling or transport requirements associated with the contents. Packaging presentation does not replace the product’s required labelling, closures or shipping arrangements. Resolve these requirements early so the decorative design can be developed around the actual distribution plan.
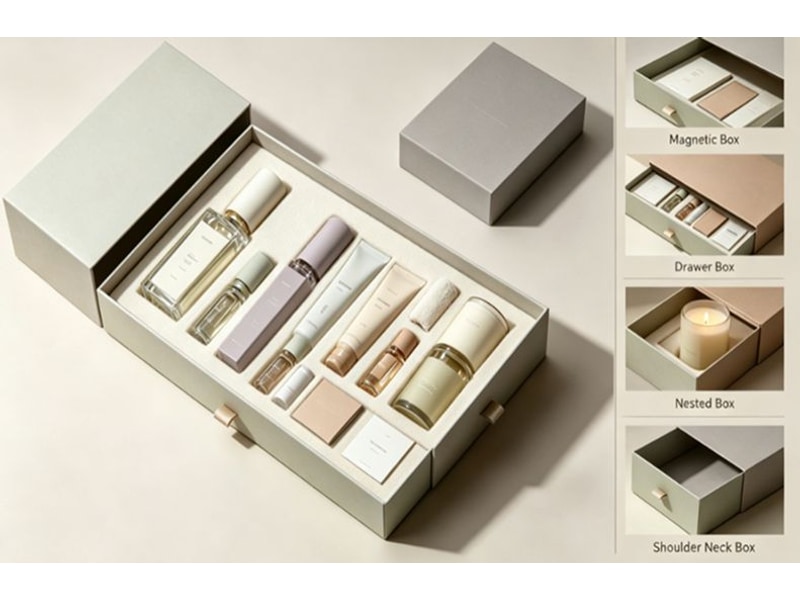
Design The Opening Sequence On Paper First
Sketch what the recipient sees before opening, immediately after lifting the lid and after removing the first layer. Each stage should have a purpose. A welcome card might establish the launch theme, while the next view presents the hero product and supporting items in a clear order.
Keep the number of layers proportionate to the story. Extra trays and flaps create more production and packing steps, and they can obscure the products. If a layer exists only because it appeared in a reference image, ask what information or function it adds to this specific launch.
Consider how the package behaves on a table. A hinged lid may remain part of the display, while a separate lid needs somewhere to be placed. Review these interactions when discussing a custom magnetic rigid box or another opening style. The structure should make the intended sequence easy to follow.
Give The Hero Product A Clear Position
Use the layout to establish priority without making the other products difficult to identify. The largest item does not automatically need the central position; the best arrangement depends on visibility, balance, support and access. Test the layout with real products rather than relying solely on a rendered top view.
Check whether names and labels face the recipient in the intended orientation. A bottle that rotates inside its cavity may hide the most useful information. A tall accessory may cast a shadow over a smaller product. These are practical layout questions that become easier to assess in a physical sample.
Avoid tight packing that requires the recipient to pull on a fragile cap or decorative feature. Discuss suitable removal access with the supplier. Finger spaces, lift tabs or a different cavity arrangement should be evaluated as part of the complete design, with the actual product in place.
Allocate Information Between The Box And The Card
The box does not need to carry every detail of the campaign. Rank the launch facts by when the recipient needs them, then allocate each fact to the opening view, a printed piece or the brand’s online resources. The brand name, launch identity and product arrangement may be enough for the first view, with fuller facts supplied separately.
| Information | Useful Location | Review Question |
| Launch theme | Lid or welcome card | Is the message understandable at first opening? |
| Product names | Beside products or on a product card | Can each item be identified correctly? |
| Usage information | Approved product material | Has the responsible product team checked it? |
| Media resources | Card with a tested link or QR code | Can recipients access it without friction? |
| Contact details | Printed card or maintained landing page | Is the contact responsible for this launch? |
| Personal greeting | Separate card | Does the packing list match the recipient? |
Keep factual product claims under the control of the team responsible for them. The packaging designer should not invent performance, ingredient or certification statements to fill an empty panel. Use approved copy and retain its revision reference with the artwork.
Plan For Camera Use Without Making Assumptions
If the kit is intended for photography or video, test the actual sample under ordinary lighting. Highly reflective surfaces may obscure printed details, while low-contrast lettering may disappear when viewed at a distance. A finish that looks attractive in person can behave differently in a close-up image.
Check whether the open lid hides the products or requires someone to hold it in position. Confirm that the front-facing view shows the intended branding after the first item is removed. These tests are simple to perform with a phone during sample review and can reveal awkward interactions before production.
Do not add packaging complexity solely in pursuit of an imagined viral moment. A clear, stable presentation is useful regardless of whether the recipient films it. Design for the real handling sequence and treat any media response as an outcome that cannot be guaranteed by the box alone.
Keep Personalisation Separate Where Practical
Personalisation can range from a printed name card to distinct product selections. Define which type is needed before estimating production and packing work. A greeting change affects a different part of the process from changing the number or shape of the products in the kit.
Where the structure is shared, a separately controlled card can keep recipient-specific information out of the main box production. This can simplify late changes, but it creates a matching task at fulfilment. Give each personalised component a reference that connects it to the correct kit on the packing list.
Use only the recipient information needed for preparation and delivery, and follow the brand’s agreed handling process for that information. Do not place private contact details on a decorative visible panel simply because they appear in the shipping list. Keep operational labels and presentation content distinct.
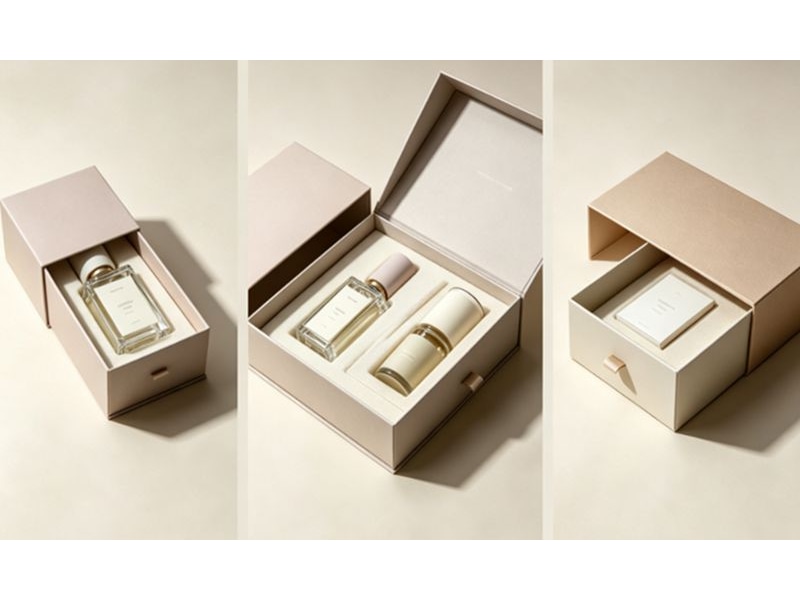
Include The Shipping Pack In Sample Review
Review the rigid box together with its intended outer packaging. A presentation box may require additional protection against scuffing, movement or crushing during distribution. The outer pack should be selected for the actual route and contents, with the logistics provider’s requirements taken into account.
Check the packed weight and dimensions after all components are included. A launch kit with an elaborate presentation platform may create more transport volume than the products suggest. Use the finished sample to obtain meaningful packing and freight estimates rather than quoting from the empty box alone.
Plan appropriate handling tests with the relevant packaging or logistics team. Record what was tested, the product configuration and the observed result. A successful local sample delivery is useful experience, but it should not be described as proof that every distribution route will perform identically.
Rehearse Assembly At The Packing Station
Pack several complete kits using the proposed work instructions. Observe how long it takes to select components, place products, add cards and close the outer carton. A layout that seems straightforward to the designer may require repeated adjustment when assembled by someone seeing it for the first time.
Look for actions that depend on judgement: aligning loose cards, choosing between nearly identical inserts or deciding how much tissue to add. Where possible, replace ambiguity with a clear reference or a defined component. The purpose is repeatability, especially when the launch quantity is assembled by more than one person.
Check the finished appearance after normal handling. Loose decorative elements may shift, and a card can fall behind a product even when it looked correct at the packing bench. Adjust the design or packing method before the final instructions are issued, then photograph the approved arrangement for the team.
Establish A Launch Approval Checklist
Assign approval responsibilities across structure, appearance, product information and distribution. One person may coordinate the project, but that does not mean they can verify every technical or commercial detail. Ask each reviewer to approve the items within their responsibility and identify unresolved points explicitly.
Keep a current sample record with the drawing, artwork version, component list and agreed packing method. If the product selection changes, revisit the affected fit and information checks. An earlier approval of the outer box should not silently become approval of a revised kit.
Build the schedule around the date complete kits must leave fulfilment, then allow for receiving and packing. Confirm which materials must be ready before box production begins and which can arrive later. This makes it easier to manage a delayed card or accessory without confusing it with the status of the entire packaging order.
Define What You Will Learn From The Launch
Before dispatch, decide which practical observations will inform the next edition. These could include packing errors, damaged components, questions from recipients or difficulties opening the kit. Such feedback is directly relevant to packaging decisions and can be collected without assuming that media coverage measures packaging quality by itself.
Ask the fulfilment team to record recurring problems while they are still visible. If cards repeatedly catch under a lid or products require adjustment, those details are easier to act on than a broad comment that the pack was “difficult.” Link the observation to the exact component or configuration.
Retain a complete reference kit and the approved packing record. This helps future teams understand the launch without reconstructing it from photographs alone. If the next campaign uses the same structure, review what has changed before treating the earlier design as ready for reuse.
Send A Complete PR Kit Brief
Prepare the audience, launch purpose, final product list, quantity, preferred opening sequence and distribution destination. Include product samples or measurements, approved copy and the date when complete kits must be ready. Explain whether there are recipient-specific cards or different product combinations.
For a fragrance project, share those details when discussing custom perfume rigid packaging. Use the Seven Rainbow contact page to request a structure and sample route suited to the kit. Ask the team to identify what the proposed sample will demonstrate and what must still be checked with the complete product and shipping pack.