
Earbud gift boxes need a defined seat for the charging case and a separately contained space for the cable, spare tips and paperwork. Choose a side compartment when the complete set should be visible at once; use a supported lower compartment when the case deserves the first reveal. In either arrangement, the accessories must stay contained after the customer lifts the case out.
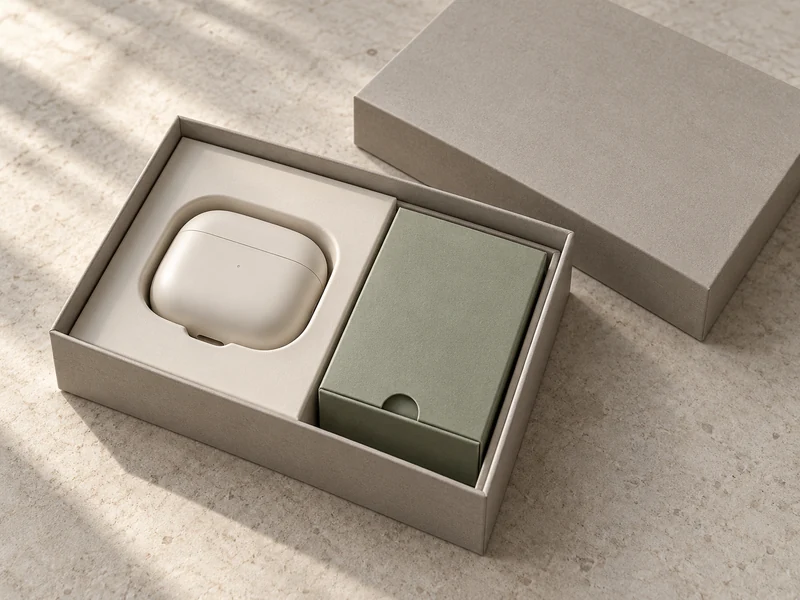
For a SevenRainbowpack project, this decision comes before the decorative paper or foil logo. A drawer, a lift-off lid and a book-style opening can all present the same earbud set, yet each asks the customer to handle the contents differently. The useful question is where the small pieces go during that movement.
What Should Be Measured Before Drawing the Compartments?
Measure the retail set exactly as it will be packed, including anything fitted around the case. A protective sleeve, a small lanyard attachment or a raised hinge can change the contact points even when the advertised case dimensions stay the same.
Keep the cable in its intended packing form while measuring it. A hand-coiled development cable may be much flatter than the cable bundle delivered to the packing line, especially where the connector sits across the coil.
- Record the closed case outline, height, hinge projection and cosmetic surfaces that should avoid rubbing.
- Include the actual cable keeper, spare-tip packet and folded instruction leaflet.
- Identify which items vary between models, markets or promotional bundles.
- Mark the direction in which the case should be lifted and the space fingers need beside it.
Give each dimension a clear reference: product size, usable compartment size or outside box size. These are different measurements. A cavity that looks generous on an outer-box drawing can become cramped after the wrapped walls and insert are fitted.
Should the Accessories Sit Beside the Case or Beneath It?
A side compartment makes the contents easier to inspect without dismantling the presentation. It also uses more visible floor space, so the box can begin to feel oversized if the accessory carton is much larger than its contents.
A lower compartment keeps the opening view quieter. The top platform then needs a reliable support around or beneath it, plus a clear lifting point; it should not rest on the cable bundle as though the cable were a structural spacer.
| Arrangement | Useful When | Detail to Resolve |
| Case and closed accessory carton side by side | Retail teams need a quick completeness check | Keep the carton captive when the box is tilted |
| Case platform above an accessory bay | The case should be the first thing seen | Support the platform independently of the contents |
| Case drawer and separate accessory drawer | The set needs distinct access to each group | Check both loaded drawers for unintended movement |
SevenRainbowpack’s two-piece rigid boxes provide a straightforward base for the first two arrangements. The open base exposes the layout clearly, which is helpful when comparing prototypes with a real product on the table.
When Does a Drawer Make More Sense?
A drawer is worth considering when the customer will keep the box for storage or when the opening direction helps explain the set. Within the custom drawer rigid box format, the case can occupy one tray while accessories remain enclosed in a fitted carton or a separate drawer.
Do not assume a ribbon pull also prevents a loaded tray from escaping its sleeve. Our discussion of drawer tray retention during handling explains the separate decision that needs attention before this structure is approved.
How Can the Insert Hold the Case Without Making Removal Awkward?
Place the holding surfaces around portions of the case that can tolerate contact, then provide a deliberate route for removal. A deep, tight recess can look tidy in a photograph while forcing the customer to pull on the lid seam or tip the entire tray upside down.
Opposing finger scallops are often easier to understand than a tiny notch tucked behind the case. Their shape must be reviewed with the actual case fitted: a cutout that exposes only a slippery curved corner may offer little usable grip.
SevenRainbowpack lists paperboard, EVA and other insert options across its rigid-box range. Treat those as different construction choices, with their own contact feel and assembly requirements, rather than assuming that one material automatically suits every earbud finish.
For a paperboard concept, inspect cut edges, folded tabs and any seam near the case. For a foam concept, check the actual material against the finished housing for rubbing, visible debris and removal effort. If the device maker specifies electrostatic controls, review them separately; an insert’s color does not establish its electrical properties.
What Keeps the Cable and Spare Tips From Migrating?
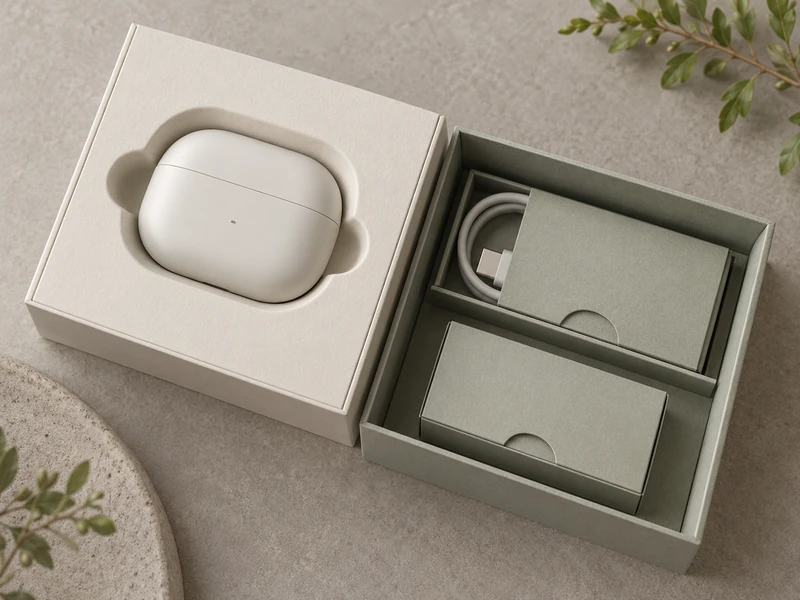
Give small accessories their own closure, then locate that closed pack within the box. A divider separates zones, but it cannot stop a loose silicone tip moving over the divider when the package is turned.
A compact paper envelope can contain paperwork and a flat cable bundle if both fit without forcing the flap. Spare tips are easier to count and retain in a dedicated packet or another suitable closed carrier. Confirm that any printed material touching those components is appropriate for the product.
Avoid letting the connector create a hard bump directly beneath the case platform. Move it into a deeper part of the accessory bay or change the cable packing method. Enlarging the whole gift box should be a considered choice after the internal arrangement has been examined.
Where Should the Quick-Start Card Go?
Place it where it will be found before the customer discards the packaging. A visible card pocket or a clearly accessible envelope works better than a leaflet trapped under an insert that appears permanently fixed.
If a lower bay requires a lift-out tray, make the lifting action recognizable. The same practical concern appears in our guide to details that make gift boxes easier to open: the user should be able to identify the next action without pulling at a fragile edge.
How Should a Loaded Earbud Gift Box Be Reviewed?
Pack the complete set, close the box and handle it in the orientations expected during packing, storage and delivery. Reopen it and inspect where everything has moved. A neat first assembly proves less than a neat presentation after the package has been handled.
- Lift the case out without holding down the insert with the other hand.
- Remove and replace the accessory carton; check whether its flap catches a divider.
- Turn the closed sample through ordinary handling orientations and inspect for escaped small parts.
- Look for contact marks on the case and pressure marks on the paperwork.
- Repeat the packing sequence with the longest leaflet and largest approved accessory bundle.
These are development checks, not a transit certification. For shipment validation, choose a procedure for the complete packed product and its distribution route; ISTA’s explanation of test procedure families distinguishes early screening from simulations of transport hazards.
Keep the gift box and shipping protection in the same discussion. A refined rigid presentation box may still need a suitable outer shipper, and changing that shipper can change the conditions the inner layout experiences.
What Should the Final Approval Record Include?
Photograph the approved arrangement before closing, after closing and after the agreed handling review. Name the accessory bundle and artwork revision in the same record, so a later cable or leaflet change does not slip through as an apparently minor substitution.
Our article on white, printed and pre-production samples helps separate layout approval from approval of production materials. A white sample can settle the compartment concept while leaving case-contact behavior or the final wrapped fit unresolved.
For an earbud box brief to SevenRainbowpack, send a complete sample set, the preferred reveal order and the intended delivery channel. Ask for the case removal, accessory containment and loaded fit to be demonstrated together. That gives the finished box a clear purpose beyond looking organized when it is first opened.