
Make the upper tier removable when the recipient needs direct access to products underneath. Keep it fixed when the lower portion is a structural plinth or a compartment reached another way. If the only route to the lower gift is through the upper tier, a permanently bonded tray defeats the purpose of two usable layers.

SevenRainbowpack’s round rigid box range includes a double-layer lift-off arrangement. The appealing part is the staged reveal; the harder part is deciding what the customer does with the upper layer once it is lifted. That action should be resolved before the circular artwork and ribbon colors are chosen.
How Will the Recipient Reach the Lower Contents?
If it contains a gift, a refill or an accessory, provide a clear route to it. A removable upper tray is the straightforward solution when both compartments share one vertical opening. A fixed platform can suit a display package whose lower volume serves only to create height.
List everything assigned to both levels, down to the care card and smallest accessory. If the lower portion is to function as storage, draw the route by which those items leave it. Specify the opening and the gripping space, or provide a removable carrier that makes the contents reachable.
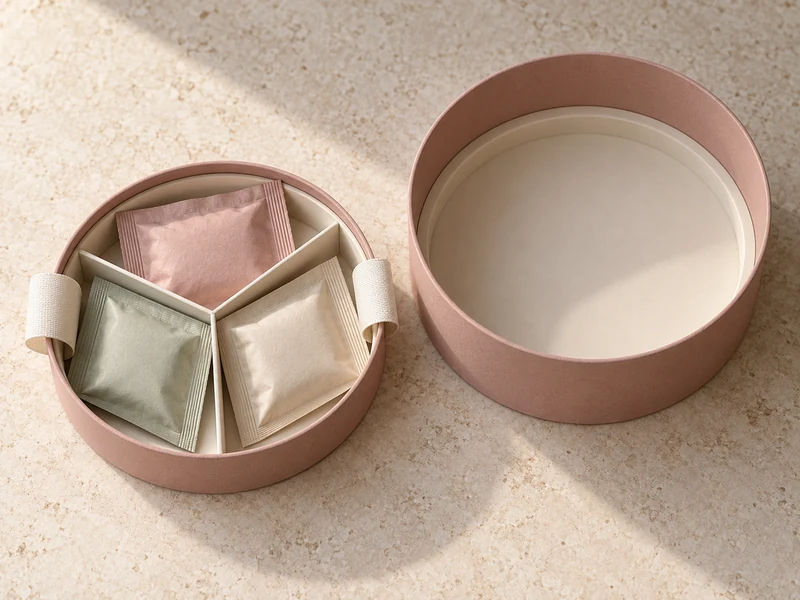
Imagine a tea gift with sealed sachets above and a small tin below. The customer must lift the sachet tray, put it down and retrieve the tin. That simple sequence requires the upper tray to carry its own contents and stand safely outside the box.
For this kind of assortment, our tea gift-box layout ideas offer a useful way to plan the two product groups. Avoid moving an awkward fit to a hidden tier and assuming that concealment solves it.
When Does a Fixed Upper Structure Make Sense?
A bonded platform makes sense when permanent alignment is more valuable than removal. It can support a single visible product, create a raised presentation or carry a divided display that never needs access underneath. Confirm that the unused space is intentional.
There are also constructions with a fixed upper assembly and a separate lower opening. Those are a different development brief, with additional joints and handling requirements. A photograph of two stacked circles is not enough to define one.
| Upper-Tier Choice | Decision to Resolve |
| Permanently fixed platform | Confirm that no product or necessary information becomes inaccessible. |
| Removable loaded tray | Provide a reliable grip, underside support and a place to set it down. |
| Separately opening stacked modules | Define how modules register and how the customer opens each one. |
A fixed platform can look simpler, but it should not be used merely to hide an uncertain tray fit. If removal is part of the experience, build for removal. If it is not, stop calling the inaccessible void a second product compartment.
Can the Upper Tray Be Lifted Without Touching the Products?
Give it a grip that acts on the tray itself. Two opposed finger recesses, a broad lifting band or suitable tabs are starting options to sample. A narrow ribbon under a heavy circular tray can tilt the contents if the user lifts from one side.
Consider the hand movement around the surrounding wall. A tray sitting flush against a tall neck may look tidy yet leave nowhere to pinch its rim. Test the grip with the largest product in place, because that product may block the very recess intended for access.
Our article on making small products easier to lift out considers finger access at a smaller scale. The same question matters here: which component is the user supposed to grasp? Make that component easy to recognize.
Where Does the Removed Tier Go?
Onto a table, without rocking, staining the surface or dropping its contents. Review the bottom face as a finished surface. Exposed board edges, proud ribbon attachments or an unsupported center are easy to overlook when only the top is photographed.
If the tray holds several items, give them their own cavities or dividers. The circular perimeter alone cannot stop a loose assortment sliding toward the lower edge during an uneven lift. A decorative fabric drape should not be the only thing controlling that movement.
How Should a Round Tray Return to the Right Position?
A circular tray can return at many angles, which is convenient until the product faces or artwork must line up. Decide whether rotational freedom is acceptable. A symmetrical arrangement may need no orientation cue at all.
If the upper and lower illustrations form one scene, or a lifting recess must face forward, add a clear registration method. A subtle keyed feature, a discreet interior mark or a deliberately positioned tab can establish the intended direction. Sample the proposal rather than assuming friction will hold the angle.
Keep the registration feature outside the product contact zone and make it easy to understand. A hidden notch that requires searching can spoil the effortless appearance of the reveal. The customer should not have to rotate the tray through several positions to make the lid close.
SevenRainbowpack’s shoulder neck rigid boxes offer a related way to frame the opening. If a neck is used to locate a removable round tray, confirm its seating function and finger access together. A taller surround is not automatically a better locator.
Which Dimensions Need Separate Attention?
Specify the finished tray diameter, the usable internal diameter at its seat, and the vertical space reserved for both layers. Wrapping and circular seams affect fit. Measure the sample at more than one position instead of relying on a single diameter reading.
A tray that drops in nicely while empty may behave differently when loaded and lifted. Its base can flex, or its wall can rub against the surrounding cylinder. Compare removal and replacement with the actual contents rather than choosing a very tight fit for the sake of an empty-box photograph.
Also check the underside clearance above the lower products. A hanging lifting band, a thick base wrap overlap or a deflected upper tray must not press on a cap below. Include these local features in the section drawing.
Should the Heaviest Item Go on the Bottom?
That is often a useful starting arrangement, but the retrieval sequence still matters. A heavy lower product can make the remaining base stable while the tray is removed. It can also make the final lift awkward if the lower compartment is deep and narrow.
Try the complete sequence on a table and in the expected gifting situation. If the user must hold the lower cylinder in midair while lifting the upper one, the design is asking for more coordination than the photograph suggests. Change the opening sequence or grip before adding decorative hardware.
How Do You Compare Two Prototypes Fairly?
Use the same products, exterior dimensions and presentation requirements. Compare a fixed structure only against a removable structure that can perform the same access job. Otherwise, the apparently simpler option may simply omit a necessary function.
ISTA’s packaged-product evaluation guidance emphasizes defining acceptable product and package condition before testing. For this box, include tray distortion, product displacement and loss of seating as agreed evaluation points. A hand demonstration alone does not establish transport performance.
Record how the loaded tier lifts, rests and reseats. Photograph the underside and the lower compartment as well as the first reveal. These views turn an attractive concept into a construction that can actually be discussed and improved.
How Much Information Should Be Visible After the First Lift?
Give the lower layer its own clear presentation rather than treating it as a storage cavity revealed by accident. A small card, a contrasting lining or a deliberately centered product can establish that the second stage was designed. Keep essential instructions attached to the layer where they are needed.
For a beauty gift, imagine the upper tier holding daily products and the lower tier holding a weekly treatment. The two stages can carry related colors without duplicating the entire graphic treatment. A restrained change in lining may communicate the shift more gracefully than adding another ribbon and another message.
Review the opening with the upper tray placed beside the base. Both layers should look finished together, including the upper tray’s outer wall and the lower support ledge. Any raw edge hidden in the first view becomes part of the second presentation.
If the removed tier is intended for continued use, confirm that its grip details and base finish suit that role. Reuse should follow from the construction rather than appear only as a line in the marketing copy.
What Makes the Final Choice Feel Right for the Brand?
A removable tier rewards a gift with a meaningful second chapter. A fixed platform suits a quieter, single-stage presentation where added height frames the product. Neither should create unnecessary movement merely to make the opening look theatrical.
Use our article on the visual language of round gift boxes alongside the structural review. The circular wrap, seam position and tier identity should support the opening sequence. Send SevenRainbowpack the complete contents and a short account of how the recipient will reach each layer, then let that sequence guide the sample.