
Make small products easier to lift out by giving fingers a usable grip or providing a carrier that raises the product into reach. A beauty gift box can hold every item neatly and still be awkward to use if the insert covers the only surfaces a customer can grasp. Design the removal action alongside the cavity.
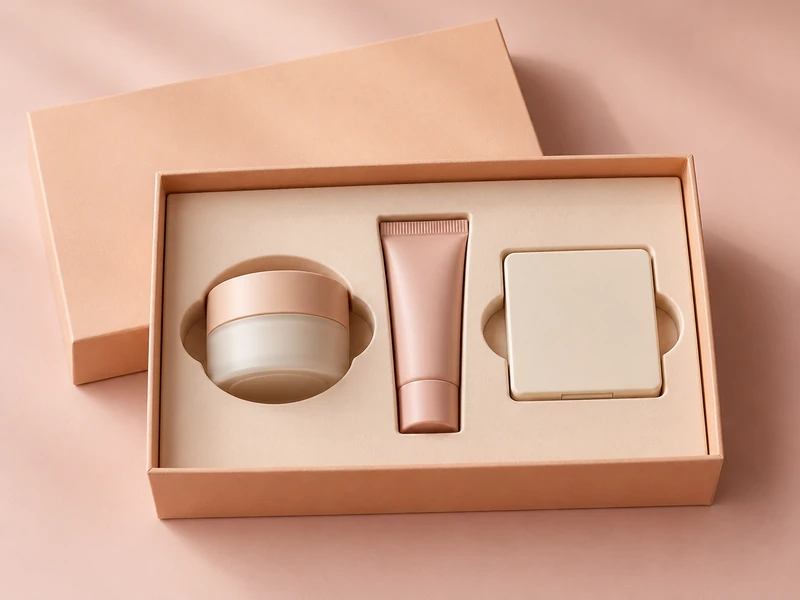
SevenRainbowpack’s cosmetic range includes jars, palettes, lipsticks, sample kits and beauty tools, so one cutout shape will not suit the whole set. A tiny cream jar needs side access; a flat compact may benefit from a lifting ribbon. Here are six ways to resolve those differences without turning the interior into a collection of oversized holes.
1. Give Finger Scallops Somewhere Useful to Go
Place opposing scallops where fingers can reach the product body, with enough depth to establish a grip. Two graceful crescents beside a jar are mainly decoration if they reveal only the rounded cap edge. Review the recess with the actual item installed.
The scallops need to cooperate with the surrounding box wall. A cutout may be wide enough on the insert drawing but become inaccessible when a tall wall stands immediately beside it. Moving the cavity inward or changing its orientation can be more useful than making the scallop larger.
The Arthritis Foundation’s Boxes & Bags ease-of-use guide discusses openings that accommodate the hand and release points that are easy to grasp. Apply that principle to the loaded cosmetic set, then check it with intended users. It does not supply a universal scallop dimension for a lipstick or compact.
Keep holding points outside the finger openings. If enlarging a scallop makes the product fall out when the box is tipped, revise the remaining cradle rather than closing the access again. Grip and retention need different parts of the shape.
2. Run a Lift Ribbon Beneath the Product
A broad, visible ribbon can raise a flat compact or short jar just enough for the customer to take hold. Route it beneath the body and bring the free end into an open recess. A ribbon trapped under another item or hidden against matching paper is easy to miss.
Check where the load travels as the ribbon is pulled. If the insert grips the compact tightly, the ribbon may bend the tray before it lifts the product. Ease the local retention and confirm the ribbon cannot slip out sideways.
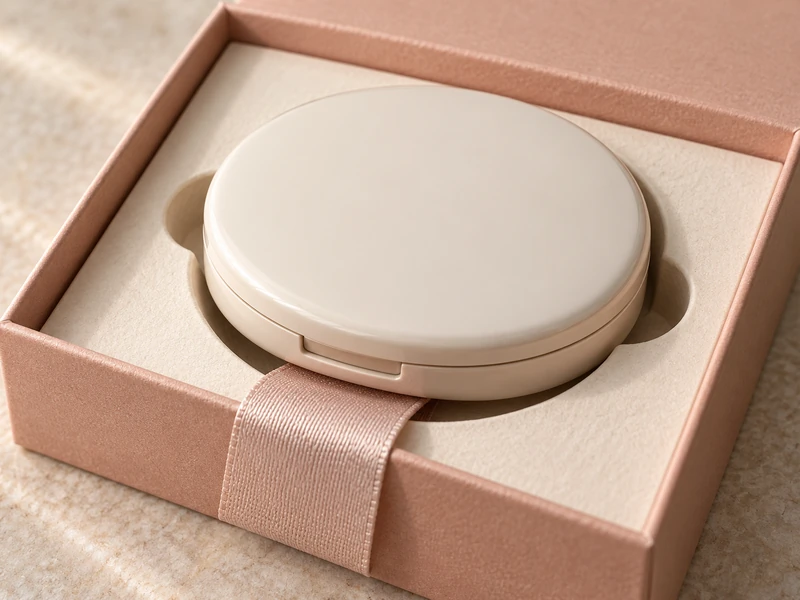
SevenRainbowpack lists satin and grosgrain ribbon options within its cosmetic rigid box customization. Select the width, texture and route for the object being raised, then match the shade to the interior. A narrow decorative ribbon and a usable product lift are different specifications.
For a set with several small items, separate ribbons can become visually busy. Give the hardest-to-grasp item the lift assistance and use simpler access elsewhere. Also confirm that the free end stays clear of the lid seam when the box closes.
3. Lower the Local Wall Around the Grip Area
Expose part of the product above a shallow collar, or lower the insert around the place fingers need to reach. This can preserve a clean silhouette while making a short cylindrical jar much easier to grasp. The entire tray does not have to become shallower.
Support the item at a suitable lower body surface and check its stability independently. Raising a jar on an unsupported paper platform can trade a grip problem for a rocking problem. The shelf beneath it needs to carry the loaded weight.
Pay attention to closures: a customer who can reach only the jar lid may unscrew it while trying to remove the jar. Aim to expose enough of the body to lift the closed container. For delicate tools, the same decision must avoid putting the grasp point at the working head; our beauty tool packaging guide explains that distinction.
4. Put the Smallest Item on a Removable Carrier
A folded paper carrier can turn a tiny product into something with a larger, recognizable handle. The recipient lifts the carrier, then releases the item outside the cavity. This is worth testing for miniature vials, small accessories or an awkwardly thin compact.
The carrier must remain properly seated during handling. Use a locating feature and a planned lifting area, rather than relying on a loose card that can tilt under neighboring products. Smooth the edges that meet the container and keep folds away from closure seams.
There is a packing-line tradeoff: an extra carrier adds another part to prepare, load and inspect. Ask whether it solves a real removal problem or merely adds an extra reveal. A well-placed scallop is often preferable when it already gives comfortable access.
5. Lift the Tray Before Lifting the Products
A supported removable tray can bring several shallow products above the box rim at once. Give it opposing grips or a stable lifting tab and make the action understandable. The tray should emerge level without requiring the customer to balance the contents on a single narrow ribbon.
This approach suits an upper layer above a separate accessory compartment, provided the tray has its own support. It should not sit directly on a rolled cable, sachet stack or loose leaflet. Review removal with every intended item loaded.
In a drawer rigid box, pulling the drawer opens the package but does not automatically free the products. You may still need local scallops or a removable insert platform. Keep those two actions distinct in the prototype review.
Our comparison of ribbon pulls and thumb notches concerns access to the drawer itself. Use that article for the first movement, then examine how the hand reaches each cosmetic once the drawer is open.
6. Make the Holding Detail Release in the Lifting Direction
Change the local retaining geometry if the product is trapped by the insert. A folded paper tab, a small bridge or a foam opening may hold well in transit but catch the container as it rises. The release needs to follow the intended lifting direction.
In a paperboard design, compare a shaped support with a continuous tight surround. In EVA or a molded tray, inspect the actual cavity and contact areas rather than assuming a softer feel guarantees easier removal. SevenRainbowpack offers several insert materials, and each needs its own loaded fit review.
Avoid solving the problem by loosening every cavity equally. The small bottle may become unstable before the flat compact becomes accessible. Revise the difficult location, then check that neighboring items still stay separated.
Which Method Fits Each Product?
Start with the simplest feature that gives a secure grip, then add lift assistance where access remains poor. The following combinations are development options, not fixed rules. Product finish, weight and closure type can change the choice.
| Product | First Option to Try / Watch For |
| Short round jar | Opposing body-level scallops / Accidentally pulling only the lid |
| Flat compact | Lift ribbon or lowered grip area / Ribbon dragging against a tight cavity |
| Miniature vial | Removable carrier / Carrier tipping during removal |
| Several shallow pieces | Supported lift-out tray / Uneven lifting with the set loaded |
How Should the Finished Set Be Tried?
Ask someone unfamiliar with the prototype to remove each item without coaching. Observe where they reach first, whether they pull a cap and whether they turn the box over. Those movements reveal more than a designer demonstrating the intended sequence.
For boxes kept on a dressing table, put the set back into the insert and try a second removal without resetting every ribbon. Watch whether the access remains obvious after that less formal repacking. The same question carries into our discussion of cosmetic gift boxes as part of a daily ritual, where the package becomes part of using the set.
What Changes When the Assortment Changes?
Recheck the access whenever a promotional set substitutes a different jar, compact or sample size. A replacement can fit inside the old cavity yet present a less useful grip surface. A taller cap or smoother coating may change how the recipient removes it.
Include the routine card and decorative tissue in the trial. A card laid across the ribbon can hide the lifting cue, while tissue tucked down a scallop can occupy the space intended for fingers. Arrange those additions after the access details have been settled.
Photograph the easiest place to grasp each awkward item and the position of its ribbon or carrier tab. Give that reference to the people loading the box, so the access feature does not migrate under tissue or a neighboring product. For assortments using a shared outer box, keep a separate loaded view for each insert arrangement.
Send SevenRainbowpack the complete set, including labels and protective sleeves, with the preferred grip area marked on photographs. Approve the loaded box after both a retention check and a removal review. The useful result is an interior that looks composed and lets the recipient get on with using the products.