
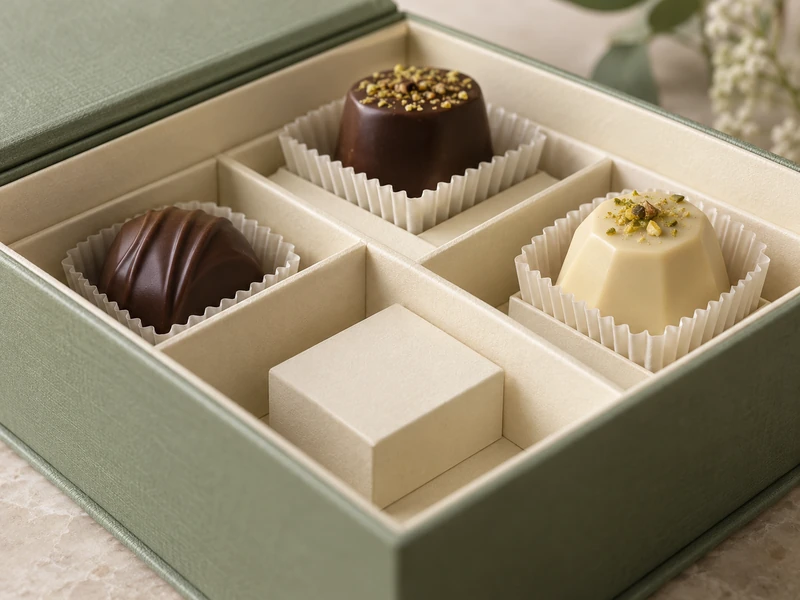
Different-sized chocolates look level when their support heights are adjusted individually. The shortest piece needs a higher seat, the tallest needs a deeper pocket, and every piece still needs enough separation and removal space. Making all compartments the same depth rarely achieves that result.
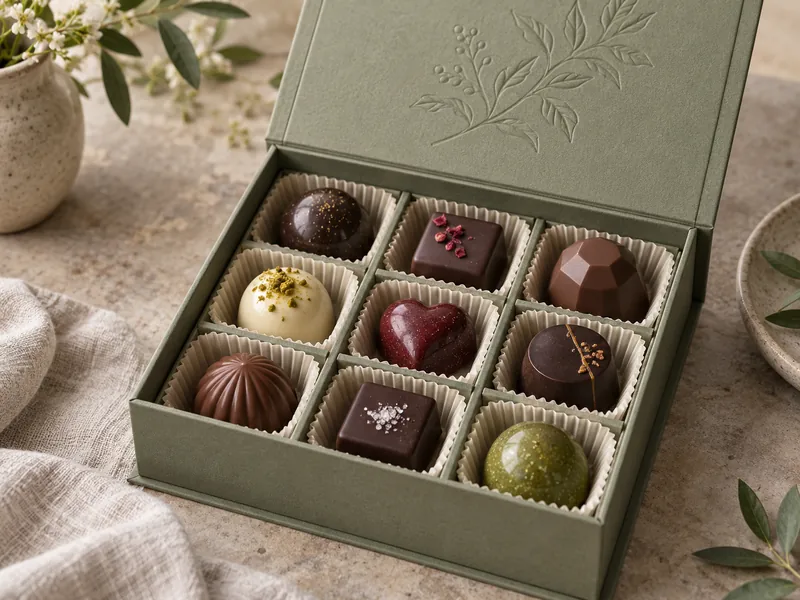
For a Seven Rainbow assortment box, start with the chocolates in their final cups or wrappers. Then develop the insert around those assembled pieces, using the desired presentation plane as a reference rather than treating the box floor as the only possible starting point.
What Does “Level” Mean for This Assortment?
Decide which feature should align: the tops of the chocolates, their main decorative surfaces or the rims of the paper cups. These are different visual targets, especially when a tall truffle sits beside a flat praline.
A perfectly equal top line can also look unnatural if one piece has a deliberate sculpted peak. In that case, align the main bodies and allow the distinctive detail to rise above them.
Photograph the complete assortment from the customer’s opening angle. A layout that appears balanced directly overhead may look uneven from the front, where the compartment walls conceal the smaller pieces.
Seven Rainbow’s chocolate gift box tasting journey considers how an assortment is read in sequence. Support heights should preserve that sequence, allowing the quieter shapes to remain visible beside the more dramatic ones.
Which Measurements Should Be Taken First?
Measure the finished, packed piece rather than only the chocolate mould. Include the cup base, pleats, wrapper folds and any decoration that must remain untouched.
For each variety, record its footprint, overall height and the area that can safely rest on a support. Note irregularities such as a rounded base or a wrapper seam that makes the piece rock.
Use representative production pieces, not one unusually neat sample. Hand-finished chocolates may vary enough that the highest decoration or widest cup becomes the controlling dimension.
- Identify the tallest packed piece and its required lid clearance.
- Record the smallest piece and the amount of elevation needed for visibility.
- Check cup spread after the chocolate has been placed inside.
- Mark fragile decorations that must avoid wall and lid contact.
- Confirm how fingers will reach each cup without touching neighbouring pieces.
How Can a Simple Height Calculation Help?
As a design example, suppose the intended top plane is 32 mm above the insert datum. A packed piece measuring 22 mm high would need roughly 10 mm of elevation, while a 29 mm piece would need about 3 mm, before construction and fit allowances are resolved.
Those numbers illustrate the relationship; they are not Seven Rainbow production tolerances. The final seat heights must be checked with the actual cups, chocolate variations and insert materials.
Which Insert Structures Can Create Different Seat Heights?
A stepped paperboard support, separate raised platforms or a formed tray with varying pocket depths can establish the presentation plane. The choice depends on the assortment, packing method and material brief.
For a paper-focused concept, concealed folded supports can raise selected compartments while keeping the visible top surface calm. Their folds must remain stable under the pieces and during packing.
A formed tray can give each shape a dedicated seat, but that specificity makes later assortment changes harder. Before committing to a shape-dependent insert, decide whether the same box will carry seasonal substitutions.
| Approach | Useful Characteristic | Detail to Resolve |
| Common Top Grid With Raised Seats | Orderly surface across mixed heights | Support stability beneath each compartment |
| Separate Paperboard Platforms | Local height adjustment | Assembly sequence and platform location |
| Formed Pockets of Different Depths | Shape-specific positioning | Compatibility with future assortment changes |
| Cups Within a Divider Grid | Clear separation between varieties | Cup movement and limited height correction |
A divider grid by itself separates pieces but does not necessarily level them. Similarly, adding a taller paper cup does not guarantee a higher chocolate position if the piece still rests on the same floor.
Why Should Loose Decorative Filler Be Avoided as a Precision Support?
Loose filler can settle or redistribute, so it is a poor way to establish a repeatable seat height. A small chocolate may look correct when first packed and sink lower after movement.
It can also complicate removal and obscure the cup. For a refined assortment, a hidden structural platform usually gives a more deliberate result than visible material packed beneath individual pieces.
Keep the decorative layer separate from the positioning task. If tissue or a liner is part of the visual concept, check whether it changes the support geometry once folded and loaded.
How Do You Keep Raised Pieces Stable?
A raised seat needs lateral control as well as vertical support. The goal is to prevent the packed piece from sliding into a neighbouring compartment or tipping over its own support.
Check where the cup touches the insert. A broad, stable base is preferable to a narrow pedestal beneath an uneven chocolate, and the cup should not be pinched into a distorted shape merely to hold it upright.
For fragile toppings, leave the upper part of the piece free of pressure. The insert should locate the packed base or cup without using a delicate garnish as a contact point.
If the chosen outer format is a drawer rigid box, assess the assortment during the sliding movement too. Starting and stopping the tray can reveal instability that remains invisible in a stationary open-box photograph.
How Much Space Should Remain Above the Chocolates?
Provide enough clearance that the lid and any inner card do not rest on the tallest decoration. The appropriate amount depends on variation, insert restraint and the way the finished package will be handled.
Raising short pieces increases their visibility but also brings them closer to the lid. Review the complete stack of box, insert, cup, chocolate and cover liner after making any height adjustment.
A flavour card can become an unintended pressure surface if it lies across the assortment. Give it a defined location rather than allowing it to bridge fragile pieces.
The cover movement also matters in a hinged-lid rigid box. Check the closing path near the rear row, where a moving lid or lining may approach the product before the box is fully shut.
What Must Be Confirmed About Food Contact?
Separate the decorative rigid shell from the materials intended to contact food. A beautiful wrapping paper or printed divider should not be assumed suitable for direct contact simply because it is paper-based.
Tell Seven Rainbow whether each chocolate is wrapped, cupped or exposed, and identify the intended contact surfaces. Request appropriate material documentation for the target market and actual use conditions before approving the assembly.
The Food Packaging Forum’s paper and board fact sheet explains why material composition and food contact deserve their own review. It does not certify a particular insert or establish that a proposed decorative finish is suitable.
How Should the Packing Team Evaluate the Sample?
Pack a complete assortment in its intended order, then inspect it from overhead and from a normal opening angle. Use the production-intent cups and packing components for this trial, since substitute cups can change the very heights being assessed.
Ask someone unfamiliar with the layout to remove a piece from each row. If they must squeeze adjacent chocolates or pull a cup by its fragile pleats, revise access rather than accepting the photograph as proof of usability.
Also replace the pieces and close the package. An insert that only looks correct after careful styling may be difficult to pack consistently at the required pace.
Seven Rainbow’s sample-stage guide helps separate structural review from final printing approval. Resolve seat geometry early, then verify the finished materials and actual assortment together.
How Should the Position Map Be Documented?
Label the compartments on a packing drawing and link each position to a chocolate variety, cup and support component. Keep that drawing with the approved physical assortment rather than relying on a styled image alone.
If two pieces share a similar outline but have different heights, make the distinction obvious to the packing team. Otherwise, a correctly manufactured insert can still produce an uneven display when the pieces are exchanged.
Check the completed box before closing it, including the rows furthest from the packer. A clear position map makes the intended presentation repeatable without asking every operator to make an aesthetic judgement.
How Can the Design Accommodate a Changing Assortment?
Group replacement chocolates by packed footprint and height range. A seasonal piece that fits the same plan-view compartment may still require a different support beneath it.
Where substitutions are expected, discuss a common outer box and grid with replaceable support components. Keep an approved layout for each assortment so the packing team does not improvise with loose padding.
For the visual changes around that shared structure, see Seven Rainbow’s seasonal gift box design approach. The sleeve or surface story can change while a carefully documented support system keeps the presentation composed.
The most convincing mixed-size assortment does not force every chocolate into an identical hole. It gives each piece a considered seat, then lets the collection read as one balanced gift.