
A balanced perfume gift set gives the full-size bottle a clear role without making the miniatures look like spare items placed in leftover space. Build the insert around the actual bottle envelopes, choose a deliberate visual alignment and resolve each product’s support and removal separately.
Seven Rainbow’s perfume range includes sets combining a main bottle with miniatures and other gift components. The most convincing arrangement begins with that relationship between the pieces, rather than a large rectangular box divided into whatever gaps remain.
Which Bottle Should Lead the Composition?
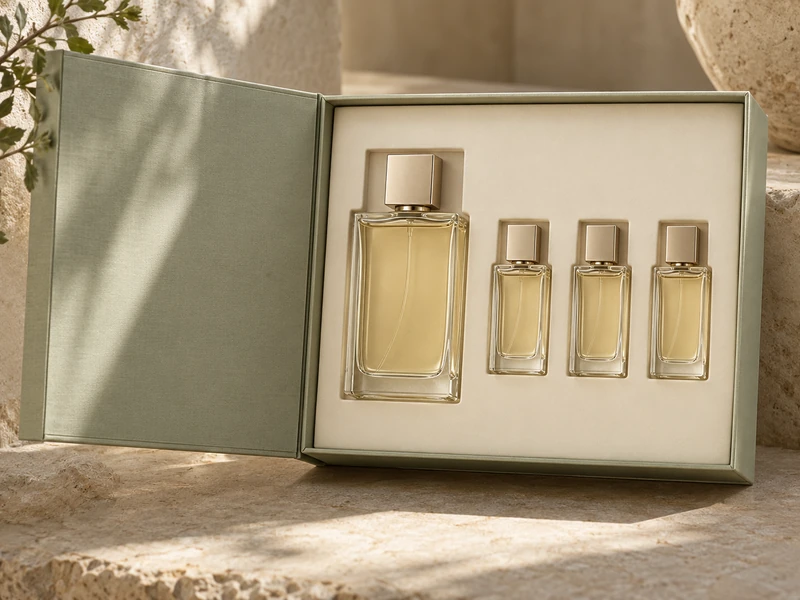
Usually the full-size bottle anchors the set, but its position should follow the opening direction and intended view. A left-hand anchor with miniatures alongside is one useful arrangement, not a universal template.
Try the complete set on a simple blank surface before drawing the cavity. Compare a main bottle beside a row of miniatures with a central anchor and smaller pieces arranged below it.
Watch where the eye goes first. A bright cap on a miniature can draw more attention than a larger bottle with a quiet label, so size alone does not establish hierarchy.
Seven Rainbow’s perfume rigid box options allow the structure and insert to follow the chosen relationship. Agree on the composition before adding decorative surface treatments.
Should the Tops, Labels or Bodies Align?
Choose the alignment that makes the products read clearly from the opening angle. Equal cap heights can look orderly, while aligning the main label areas may better communicate the fragrance family.
A full-size bottle and a miniature often have different proportions, even when their shapes are related. Forcing both onto the same cavity floor may leave one label hidden or one cap disproportionately high.
Varying seat depths can correct that relationship without filling the entire box with visible platforms. The supports beneath the products can differ while the visible insert surface remains calm.
Can a Shared Top Plane Become Too Rigid?
Yes. An oversized cap may deserve to sit above the miniature row, particularly when it is a recognisable part of the main bottle’s silhouette.
Aim for an intentional relationship rather than mathematical equality. Photograph the arrangement from normal viewing height and check whether the main bottle still leads without overwhelming the smaller pieces.
How Should the Cavities Be Designed?
Develop each cavity around the finished capped bottle in its intended orientation. Include the maximum width, height, projecting details and filled weight.
Miniatures need their own review. A slim spray tube can roll or rotate, while a miniature bottle with a broad cap may require a relief pocket separate from the body support.
Do not use the cap as the sole locating feature unless the product design explicitly supports that arrangement. The insert should hold the bottle in a way that remains stable during handling and manageable during removal.
| Component | Positioning Question | Removal Question |
| Full-Size Bottle | Where is its weight supported? | Can the body be grasped without pulling the cap? |
| Small Bottle | Can it tilt or sink into its cavity? | Is enough of the body accessible? |
| Spray Tube | What prevents rolling or label rotation? | Can fingers lift it without pressing the actuator? |
| Card or Guide | Does it have a defined location? | Can it be reached without disturbing the bottles? |
How Much Space Should Sit Between the Main Bottle and Miniatures?
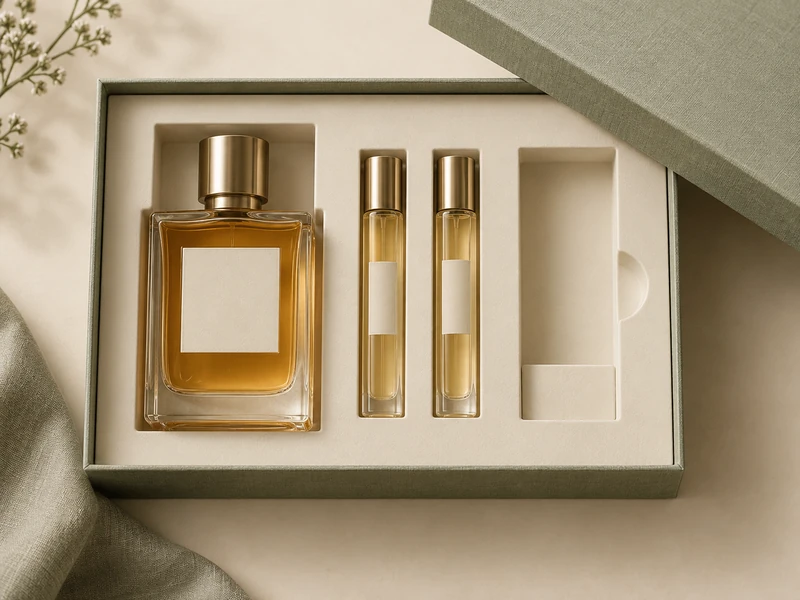
Provide enough separation for individual restraint and a useful lifting movement. The gap should have a purpose beyond making the open-box photograph look airy.
A finger recess beside the main bottle can occupy some of that space, while the miniature row may need smaller access openings of its own. Check whether removing one bottle disturbs another.
Too much empty area can make the miniatures feel detached from the set. If the composition looks scattered, refine the layout or box proportions before adding a large printed slogan to fill the void.
For a restrained material approach, Seven Rainbow’s tactile perfume packaging article is a useful reference. Texture and proportion can connect the pieces without turning every open surface into advertising space.
Which Outer Structure Supports the Intended Reveal?
A book-style box can show the full collection in one view while placing a fragrance guide inside the cover. A shoulder-neck format can frame the set with a layered edge, provided the neck does not hide the miniature bodies.
For a book-style rigid box, review where the cover rests while products are removed. A wide cover can create a generous visual stage but needs appropriate counter space.
A drawer gives the reveal a sequence, yet the load changes as the tray extends. Check the heaviest bottle’s position relative to the sleeve and any travel stop before approving the opening.
Choose the format for the set’s actual use. A dramatic reveal loses its appeal if the customer must hold the lid with one hand while struggling to extract a miniature with the other.
How Can Colour Keep the Set Cohesive?
Use a limited material palette to connect products with different proportions. An ivory insert inside a sage shell can give both a clear visual boundary while keeping the main bottle prominent.
If the miniature caps differ in colour, let them form a deliberate rhythm. Repeating those colours everywhere else may make the arrangement busier without helping customers understand the set.
Subtle texture can also distinguish the outer shell from the tray. Keep strongly patterned surfaces away from small labels if they reduce legibility.
Review real glass reflections and liquid colours on the finished paper. A combination that looks balanced in a flat rendering may change when amber fragrance casts colour onto a cream insert.
Where Should the Fragrance Guide Go?
Give the guide a defined place that supports the opening sequence. The inner cover, a slim dedicated pocket or an accessible card recess can work, depending on the box structure.
A loose card laid across bottle caps may shift during handling or conceal the very composition the insert was designed to present. If it is intended as the first reveal, check how it is removed and where it goes next.
Keep the hierarchy clear: identify the main fragrance, explain the miniature selection and let the products remain visible. Seven Rainbow’s cosmetic gift-set article offers a related way to organise a collection around an understandable routine.
What Must the Loaded Sample Demonstrate?
It should demonstrate independent positioning, safe removal and consistent closure with every item present. Test the miniatures as carefully as the main bottle; a small product can disappear too deeply into a seemingly tidy cavity.
Open the set, remove each piece, replace it and close the package without styling assistance. Then inspect whether labels remain oriented and whether any bottle can contact its neighbour.
Assess shipping behaviour with the bottles, insert, retail box and outer transport materials assembled as they will travel. The ISTA test-procedure guide explains the distinction between preliminary screening and distribution simulation, helping the team select an assessment appropriate to the planned route.
Do not treat the visual balance of the open set as evidence of protective performance. The hidden supports, outer shipping pack and actual load still need their own review.
Can One Box Accommodate Several Miniature Combinations?
A shared outer box may work if the insert strategy accounts for the different product envelopes. Swapping fragrance names is straightforward only when the physical bottles remain compatible.
If the miniature count or shape changes, consider a versioned insert rather than adding improvised filler to a common cavity. Keep each approved layout linked to its exact product combination.
Seven Rainbow’s seasonal visual-story approach can guide changes to the exterior while the structural family remains recognisable. Confirm which elements are shared and which require a new sample.
How Should the Packing Sequence Be Reviewed?
Pack the set in the order the team expects to use in production. Check whether placing the main bottle first blocks access to miniature cavities, or whether a loose guide card gets trapped beneath a product.
The insert should locate each piece without repeated adjustments to neighbouring bottles. Where orientation matters, provide a clear packing reference rather than leaving operators to judge label alignment from memory.
Then remove the contents in the likely customer sequence. A layout can be easy to pack from an empty tray yet awkward to unpack once every surrounding cavity is occupied.
Record both sequences with the accepted sample. This preserves the practical relationship between presentation and handling when the set moves from development to production.
Which Product Details Does the Sampling Team Need?
Send the complete bottle set, filled weights, capped dimensions, desired orientation and intended visual alignment. Include the guide card and any accessory that will travel inside.
State how the main bottle should lead and what the miniatures are meant to communicate: discovery, travel use or a wider fragrance selection. That gives the layout a purpose beyond fitting the pieces into a rectangle.
A balanced set feels composed because its hierarchy, support and opening sequence agree. The full-size bottle anchors the experience, and the miniatures look as though they belonged there from the first sketch.