
Choose a lid window when customers mainly look down at a flat box, and a front window when the closed package stands facing them on a shelf. Then check whether the product’s useful face is visible through that opening. The best window position follows the display orientation and insert layout, rather than the most attractive blank panel.

On a SevenRainbowpack project, define the window by the closed box as well as by the component that contains it. A lift-off lid can become the shelf-facing panel when a box stands upright. Calling it a “lid window” without showing the retail position can send the structural designer and artwork team in different directions.
Which Face Will the Customer Actually See?
Put an undecorated sample where the finished pack will be sold, whether that means a counter, an upright shelf position or a retail tray. Photograph it from the customer’s likely approach and mark the exposed panel on the image. Send this view with the structural drawing, so everyone is designing for the same shelf position and the same portion of the box remains visible.
A broad lid opening suits an assortment viewed from above, such as several shades or a compact with an attractive top. A vertical front opening can suit a bottle whose recognizable shape and label face forward. Neither reveals much if the insert places the useful surface below the frame.
SevenRainbowpack’s two-piece rigid boxes include window customization alongside changes in lid coverage and base depth. Decide those features together. A deep telescope lid and a shallow display base may create a different sightline from a short lid on a tall base.
Compare the Window Positions in Their Real Display
Use the same product and intended orientation when comparing concepts. Otherwise a larger window can appear better simply because its photograph was taken from a more favorable angle. Include the surrounding shelf or counter in at least one review image.
| Display Condition | Window Position to Explore / Main Question |
| Flat box on a low counter | Broad upper lid panel / Can the customer see the important top surfaces? |
| Upright box at shelf level | Customer-facing vertical panel / Do the product face and insert stay aligned? |
| Box partly inside a retail tray | Exposed panel above the tray lip / Does the tray hide the useful part of the opening? |
| Stacked boxes | Panel that remains exposed / Is the chosen window covered by the next box? |
For an online-first set, consider whether the closed-box image has a real role in the product listing. A small window that shows one meaningful detail may be enough. An open-box photograph may already explain the assortment better than a large transparent panel.
What Is Worth Revealing?
Choose one display promise: color selection, product silhouette, a distinctive finish or the completeness of the set. Size and position the opening around that information. Exposing more empty insert does not necessarily make the pack more informative.
For a lipstick collection, consider what the closed cases actually show. If every tube is opaque, a window may reveal packaging colors rather than the lipstick shades. Keep the visual promise accurate and let printed shade information do its job where needed.
SevenRainbowpack’s cosmetic rigid box range includes windows, custom cavities and several insert materials. The useful combination is the one that keeps the visible product face in the chosen opening. A window and an insert approved as separate decorative parts can miss each other once assembled.
Should the Insert Be Raised?
Only if the resulting product height, support and lid clearance still work. Raising the contents can improve the view through a deep frame, but it can also put a cap or compact directly beneath the film. Leave a planned gap so the window is not a product restraint.
Look through the opening from slightly above, below and to either side of the expected viewpoint. A thick frame can hide a label at an angle even when it is visible in a straight-on rendering. Adjust the product position or opening before assuming the film is the problem.
How Does the Frame Affect the Construction?
An opening removes part of the rigid panel and leaves a frame that must survive forming, wrapping and use. Keep the cutout away from critical corners, hinge folds, magnets and closure areas. The appropriate remaining width depends on the complete structure and needs a physical review.
Ask how the exposed cut edge is finished and where the transparent patch is bonded. A clean exterior opening can conceal an uneven film overlap or a lifted corner inside. Inspect both faces of the assembled panel.
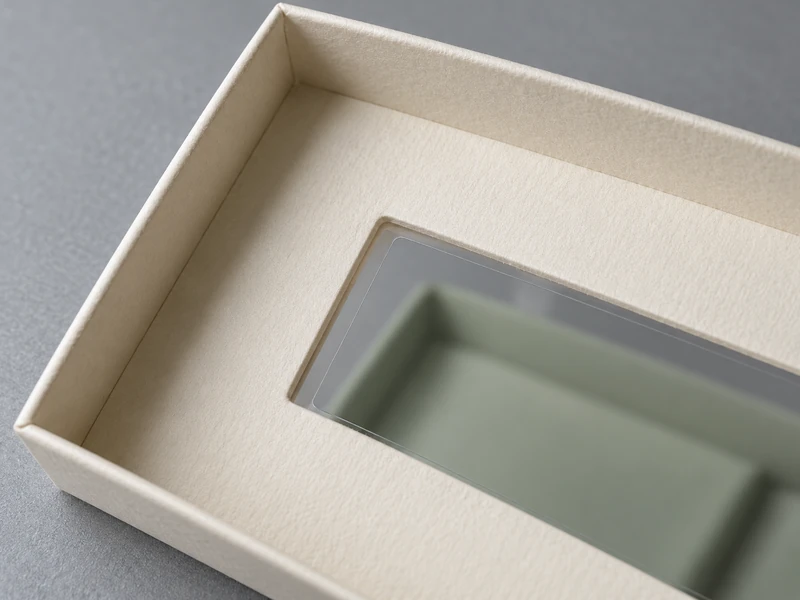
For a magnetic box, sketch the window beside the flap and magnet positions on the same drawing. Our article on full, half and shaped flap coverage helps consider which areas move or remain visible. Keep that movement clear of the proposed window bond.
A drawer creates another constraint: the product must sit at the correct position when the tray is fully closed. Its sightline should not depend on a customer leaving the tray partly open. If it will be displayed open, describe that as a separate retail arrangement.
Will Reflections Hide the Detail?
Try the sample under the lighting in which it will be sold or photographed. A clear film can show bright reflections that cover a label or product color from a particular angle. Changing the window position, product angle or light arrangement may be more useful than enlarging the opening.
Compare a straight-on view with the normal approach angle to the display. Also inspect scuffs, dust and fingerprints on a handled sample. A finish that looks immaculate under diffuse studio light may be less forgiving after repeated retail handling.
Keep the frame’s graphic treatment restrained when the product is already visually busy. A textured wrap with a small foil detail can create a quieter border than a large reflective pattern. Confirm the effect on the assembled box so reflections from the frame and film can be judged together.
What Should Be Specified About the Film?
Name the proposed material, thickness, bond method and intended separation method. SevenRainbowpack lists PET and PVC window options on its website, but those names alone do not establish the performance of a finished assembly. Review clarity, flatness, adhesion and compatibility with the product and wrapping process.
The American Forest & Paper Association’s design guidance for paper-based packaging treats polymer windows as non-fiber components and discusses how added materials affect recycling. Use that context when considering the complete pack. A paperboard exterior does not by itself establish how a particular windowed rigid box is accepted locally.
If separation is part of the design, make it practical and describe it accurately. Avoid a broad recycling claim based only on the film type or on a different package, such as an envelope. The local collection system and full material combination still matter.
Can the Same Opening Serve Several Products?
Compare the smallest and largest product variants through the proposed window. A short bottle may leave the upper half looking empty, while a taller cap can disappear behind the frame. A shared exterior works best when the insert positions each variant around a consistent visible detail.
Do the same comparison with shade changes. Pale products against an ivory insert can lose definition, while a dark case may make the frame look much narrower. Review the actual palette before compensating with a larger cutout.
If the assortment changes frequently, a modest opening around one stable feature may age better than a window tracing an exact product silhouette. The remaining panel also leaves useful room for artwork updates. Confirm that this flexibility serves the collection rather than merely preserving an early box drawing.
Approve the Closed View and the Open Reveal
Place the finished prototype in the retail fixture and photograph the closed view first. Check the frame, visible product, printed information and any obstruction from the shelf or tray lip. Then open it and examine whether the window creates an untidy interior edge or interferes with handling.
A shoulder or tall inner wall may affect what becomes visible after opening even when the closed window works. Our comparison of straight and slanted neck reveals considers that second stage. The closed display and open presentation deserve separate judgments.
Give SevenRainbowpack the product, fixture photograph, intended display orientation and the exact detail the customer should see. Follow the rigid box artwork checklist when preparing the approved cutout and print files. The final window should feel inevitable: in the place where the product is easiest to understand, with enough structure around it to keep that view consistent.